Tuesday, 8 December 2020

Aleo Vera Oil for Hair fall and aches


Aloe Vera Oil 

Experience with research and experimenting has taught me to be a patient and keep trying. I have Aloe Vera plant in a pot, when ever my knees, legs were painful I would cut a leaf, take the gel from it and massage my legs /knees /back with it and it gave relief from pain. I used the gel for hair fall also. 
I knew about the anti-inflammatory property of onion, carom seeds, garlic ginger etc. So I started making oil which would be helpful in pain relief as well as for falling hair and for improving the texture of hair. 
Garlic gave such strong smell to oil that I could use it hair. So I removed garlic as ingredient and used onion, aloevera and carom seeds and ginger. Finally I got an oil which has pain releaving property as well as reduces hair fall. The texture of hair also becomes very smooth after applying this oil. I have been using this oil for almost a year now. So it is well tested. 

Preparation Time : 30 minutes 
Making Time : 50 minutes
Makes 300 ml. Oil 

Ingredients Required To Make The Oil :
  • 5 Aloe Vera leaves 
Aloe Vera leaves 
  • 250 ml Coconut oil 
  • 100 ml Sesame oil 
  • 4 Teaspoons Carom seeds (Ajwain) 
  • 4 Tablespoons Onion paste 
Directions For Making Oil :
  • Cut Aloe Vera leaves from sides. Carefully remove the upper green cover and scoop all gel from the leaves. 
Different Stages of extracting gel 
  • Peel onion and cut to pieces. Pulse it in grinder /mixer to give fine paste. Do not add water. 
  • In a big thick bottom container take 

 Oil, Onion paste, Aloe Vera gel, Carom seeds 
  1. 250 ml coconut oil 
  2. 100 ml Sesame seed oil 
  3. Onion paste 
  4. Carrom seeds 
  • Keep the container with oil and herbs on medium heat and let the oil mixture start to bubble. 
Oil and herbs bubbling on low heat 

Mixture cooking on low heat 
  • Once it starts bubbling bring the heat to low and cook with regular stirring. 
  •  The mixture will start foaming. Switch off the heat and let it cool a bit for foam to settle down. Then again bring the heat to low and cook with stirring. 
Stage when heat to be switched off 
  • Repeat this process of switching off and switching on while cooking till foam appears. Do not stir vigorously. Be gentle while stirring else foam will come out of container spilling the oil. 
  • After almost 40 minutes it will be observed that the Aloe Vera gel has shrink to strips and onion paste turned light pinkish brown. 
  • Switch off the heat and allow it to cool. 
Oil ready with residue turning brown 
Residue to be discarded 

  • The oil density and color will change and residue will have turned brownish. 
  • Sieve the oil, squeeze  oil from residue as much as possible. 
  • Store this oil in any type of container you wish to. 
  • Apply this oil luke warm on scalp and hair strands. Keep for minimum 2 to 3 hrs. (I prefer 5 to 6 hrs.). 
  • Wash hair as usual. 
  • Repeat this once a week. After some time you will notice reduction in hair fall and hair texture changing to smooth silky texture. 
  • Legs, back, joints pain is relieved by massaging by this oil. 

Tips:
  • For 350 ml oil I took 2lt container to make sure foam does not spill. Take bigger container till a certain degree of expertise is obtained in handling hot oil foam. 
  • Container should be thick bottom. 
  • Cook only on low heat with constant stirring. 
  • Switch off heat when residue starts turning brown, the residual heat will keep on removing the remainder moisture from gel and onion paste. 
Suggested variations :
  • 100 ml. Sesame seed oil can be replaced by 50 ml each of sesame and mustard oil. 


Saturday, 18 July 2020

चाय की छन्नियों को साफ करने का आसान तरीका


चमकती हुई साफ़ छन्नियां 
अक्सर चाय की छन्नियां कुछ दिन इस्तेमाल करने के बाद बदरंग होने लगती हैं और उनकी जाली में चाय के बारीक कण फंस जाते हैं और जाली गंदी हो जाती है।
चाय की छन्नी को साफ करने के लिए उसे या तो रगडना पड़ता है। कितना भी रगड़ो सभी बारीक कण और स्टील के फ्रेम और जाली में चिपकी सभी गन्दगी नहीं निकलती।
कुछ लोग छन्नी को धीमी आंच पर जलाते हैं।
जब छन्नी जलाई जाती है तब धुआँ और गन्ध आती है। छन्नी काफी हद तक साफ तो हो जाती है परन्तु उसका रंग जलने के कारण काला हो जाता है।
छन्नी साफ करने का नया और सबसे आसान तरीका जिससे छन्नी काली नहीं बल्कि बिल्कुल नयी जैसी हो जायेगी।
सामग्री ;
  •  १ चम्मच सर्फ या अन्य कोई कपड़े धोने का पाउडर
  •  १ दांत साफ करने का पुराना या नया ब्रश
  •  १ डोंगा जिसमें छन्नी रक्खी जा सके
  •   पानी
साफ करने की विधि ;
  • डोंगे में इतना पानी लें कि छन्नी का जाली वाला भाग उसमें डूब जाये।
  • डोंगे के पानी में एक चम्मच सर्फ डाल दें।
  • गन्दी छन्नियां डोंगे में डाल कर डोंगे को गैस पर कम आंच पर रख कर गरम करें।
मैली छन्नियां 
मैली छन्नी 
साबुन के पानी में छन्नियां 
  • पानी उबालने लगेगा और छन्नियों की गन्दगी धीरे धीरे पानी में आने लगेगी।
  • पांच मिनट तक कम आंच पर उबालने दें।
  • गैस बन्द कर दें और छन्नियों को पानी में ही ठण्डा होने दें।
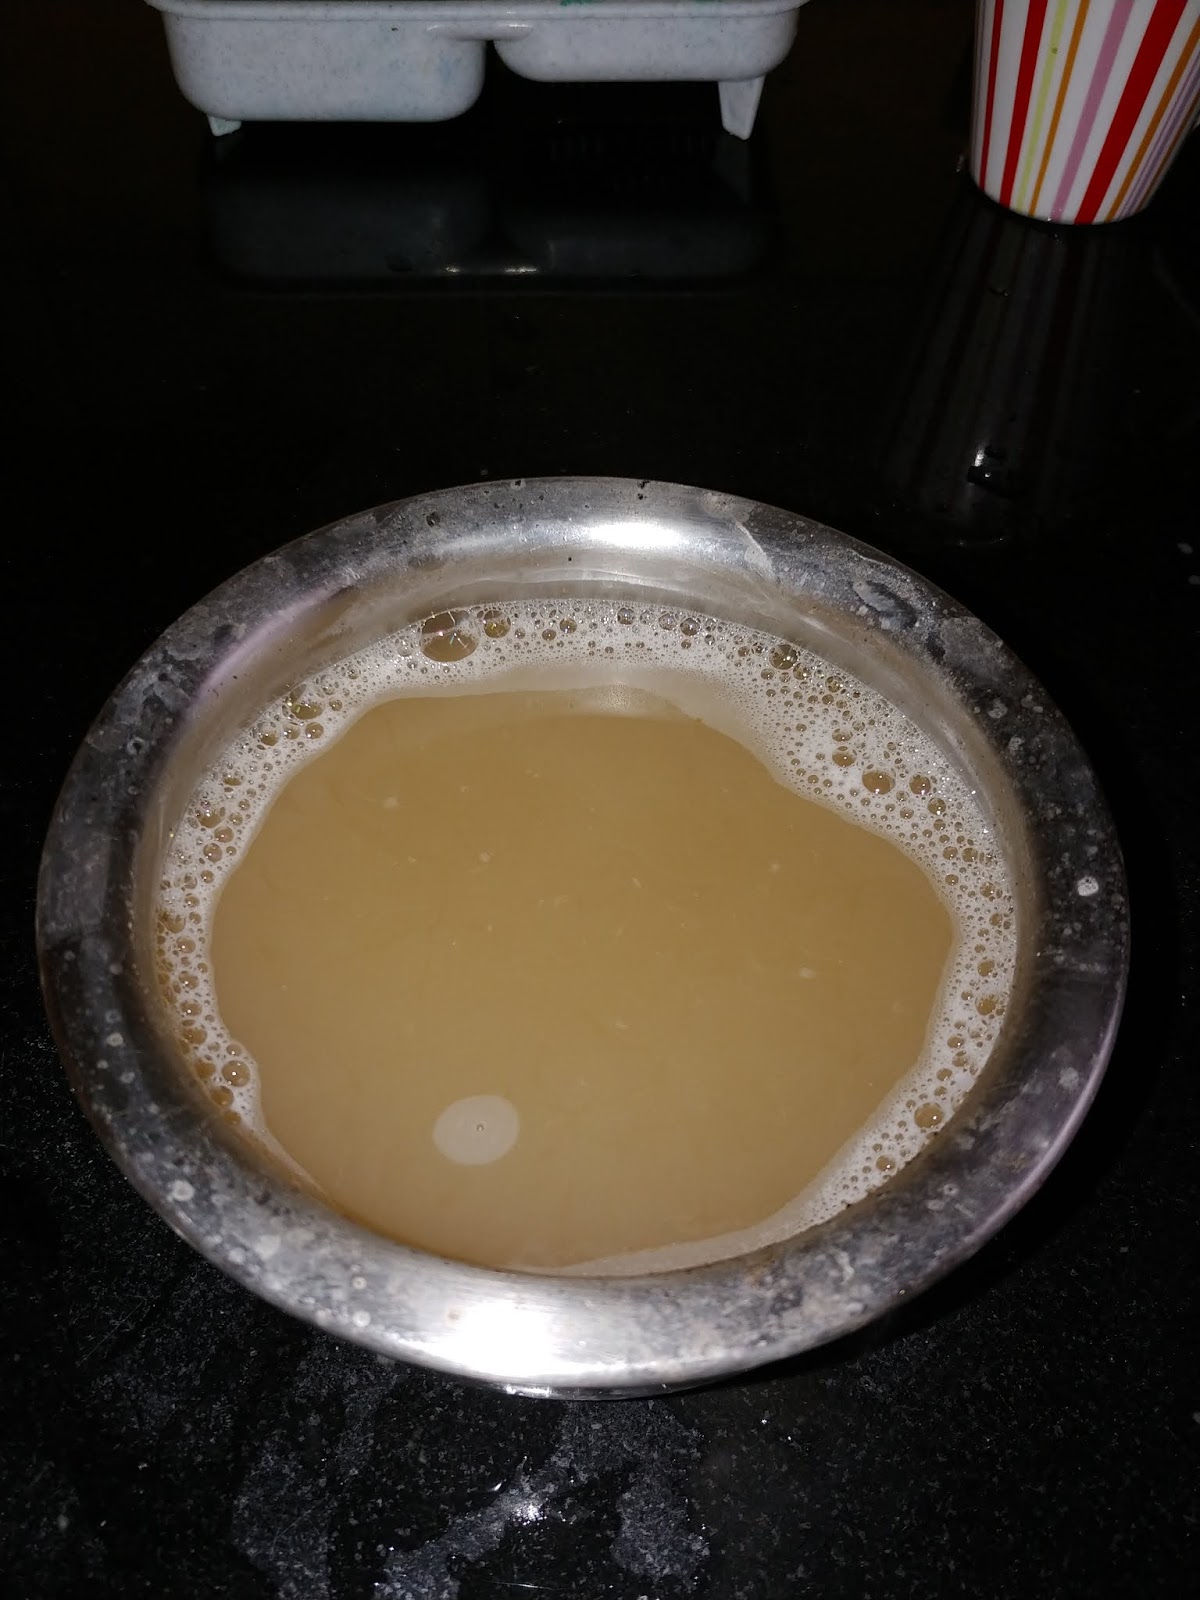
  • आप देखेंगे कि पानी कचैला और गन्दा हो गया है।
५मिनट उबालने के बाद 
छन्नियां उबालने के बाद बचा पानी 
  • एक एक करके छन्नी निकाल कर ब्रश से साफ करके धो लैं। रगड़ने की आवश्यकता नहीं पड़ती।
  • आपकी छन्नियां साफ सुथरी चमचमाती नयी जैसी हो जायेंगी।
चमचमाती साफ छन्नियां 
टप्स:
अगर आपकी छन्नियां प्लास्टिक की हैं तो बड़ बबर्तन लें। 
साबुन पाउडर और पानी डाल कर उबाल लें। 
गैस बन्द करके पानी ठण्डा होने तक छन्नियां उसी में रहने दें। 
ठण्डा होने पर ब्रश से साफ करके अच्छे से धो लें। 
छन्नियों के साथ ना उबालें। 

Thursday, 16 July 2020

How To Clean Tea Strainers


Clean Strainers
It is seen that tea strainers whether they are metallic or of synthetic material, after few weeks of use they start getting stained and the seive starts getting clogged by very fine particles. I make ghee at home so I use the strainer for straining ghee (Clarified butter) also.
Scrubbing the stariner for cleaning is not a great option as the edges between sieve and the meatl strip retains the dirt, also it is too cumbersome with not so staisfactory results. After some time the strainer looses its shine and we normally discard it and get a new one.
Some people keep the stariner on low flame till all particles in the siave, all dirt in the edges gets burnt, then scrub it hard to clean it. This though cleans to quite an extent but the stariner becomes black due to getting burnt. Also burning leaves the kitchen with disagreable smell and lots of smoke.
Today I am telling the best, easiest way of cleaning the strainers.

Material required:
  • 1 Teaspoon: Cleaning Powder or Cleaning Liquid (I used Surf)
  • 1 Old / New Tooth brush
  • A pan big enough to hold your strainers
  • Water
Direction For Cleaning Tea Strainers:
Dirty Strainer
Dirty strainer
Dirty Strainers
  • Take a pan big enough to put your stariners in it.
  • Fill the pan with water and add one teaspoon of cleaning powder / Liquid.
  • Put the stariners in the water and cleaning powder mixture in the pan with the sieve side in water.
Dirty Strainers Kept For Boiling In Water Soap Mixture
  • Keep the pan with stariners, water and cleaning powder mixture on medium heat and allow it to boil.
  • Once the water starts boiling lower the heat and let it boil for 5 minutes.
  • Water will become murky due to dirt of stariners coming in it.
Dirty Strainers in boiling water and soap
  • Let the water cool.
  • With the help of tooth brush remove all particles and stains by slowly scrubbing it. It will be very easy and effortless. It will take just a minute or so. 
  • Wash under flowing water. 
  • Lo and behold you have your strainers looking new ans shiny again.
Cleaned  Strainers
Tips:
  • Incase of synthetic stariners water and cleaning powder / liquid mixture will have to be boiloed first, then afetr switching off the heat the dirty strainers will have to be put in it. Let the strainers be in the hot water cleaning powder mixture till it cools off then scrub them off clean. 


Sunday, 2 March 2014

Make Manure At Home

One of the many potted plant in soil with home made manure
When I moved to city apartment from government bungalow with open space around it I was appalled by the sight of flowers used during prayers by city dwellers strewn all over road side telling the tale of apathy towards the  sacredness of those flowers as well as toward the cleanliness of the surroundings. During rainy season these flowers would rot and leave a decaying stench all around. It made me think how will I dispose of the flowers I use for worshipping the deities.  I did not want these sacred flowers to become nuisance for others nor did I want them to be trampled by passerby’s feet.  Thus I got this Idea of making good use of these flowers without causing any trouble to anybody. Just imagine how would you feel if you see the bouquet so fondly presented to friends lying by the roadside after a day or two. Want to save your friend and family of the same trouble? This easy method can be used in small flats also. No stench, No hassle all flowers and leafs used to make manure for the potted plants.

Ingredients for Manure:
  • All flowers and leafs used at Home
Directions For Making Manure from the Flowers and Leafs:
  • Instead of throwing the flowers and leafs in dustbin/roadside to decay and cause stench or trampled upon, Allow them to dry in the Sun/Shade whatever is possible in your apartment.
Flowers and Leafs drying
  • Separate the petals to break the flowers to small parts and it easy to dry.
Flower Petals Separated during Drying
  • It is better if the flowers and leafs are kept for drying in the wooden basket as it allows aeration.
  • When the flowers/leafs are dry grind them in domestic mixer/grinder to make coarse powder.
Powdered Dry Flower and Leafs added to Soil
  • Mix the soil of pots with this dry coarse powder of the dry flowers/leafs and mix nicely.
Mixing Powdered Flowers and Leafs with Soil
  • Sprinkle little water daily in the morning for three four days and allow the mixture to dry in open. After three four days the soil with home made manure is ready for pots and potted plants.
Soil with Home Made Manure Ready for pots and Potted Plants
  • Fill this soil and dry flower/leaf mixture in the pots and water the soil in the pot to make it wet. Do not water so much that water starts draining from the pot.
  • Let the flower/leaf powder and the soil mix and this will make excellent compost from the flowers which you use to decorate the house/pray.
  • When the soil with manure dries in a week or so plant the plant of your choice and water according to need of the plant.
  • You have just saved your city from some extra garbage, yourself expenditure of purchasing manure and citizens from the ugly sight of strewn, decaying flowers and bouquets.
  • Make use of the home generated wet garbage and save your city.
Tips:
  • Holes can be made to big/small cartons and can be used to dry the flowers/leafs.
  • Flowers can be split to smaller pieces and leafs removed from their stalks. This enhances the rate of drying.
Alternate Suggestion(s):
  • The flowers and leafs can be ground to paste and mixed with little amount of soil and filled in the big pot. Repeat it till the pot is full. Cover it with dry soil and allow to rest for 10-15 days. The wet material will change to fantastic compost.
  • The pot with soil and compost is ready for plant to be potted.
  • Those who have open area around house can always dig a 2ft x 2ft hole and put the flowers and leafs for decaying so that it can automatically gets mixed with soil and manure is formed in 10-5 days.

Wednesday, 23 October 2013

How to Keep Chopping Board Clean and White

Chopping Board After Cleaning
Chopping Board before Cleaning
Chopping board become dirty very fast due to the scratches it gets from knife. The scratches get filled with the juices of vegetables and gather dust and daily regular way of cleaning does not help to larger extent. So if not cleaned properly from time to time it not only looks repulsive but is also unhygienic. Thus it is imperative to clean the dirty board properly. Here is the simple way of maintaining the chopping board neat and clean. This process should be done once a month so that the board remains clean, hygienic and looks as if new.
Time Taken To Clean One Board: 15min. (Soaking time not included)

Materials Required For Cleaning Chopping Board:
  • 2 Teaspoons Surf or any washing powder
  • 2 Teaspoon Vanish
  • Water
Directions For Cleaning The Dirty Chopping Board:
Dirty Chopping Board
  • Wash the dirty board with water.
  • Mix the washing powder and vanish powder.
  • Sprinkle 2 teaspoon of this mixture on the board and allow to rest for 2-3 hours.
Washing Powder Mixture Spread On Chopping Board
  • After 2-3 hours the cleaning powder mixture along with the water will have acted on the dirt in the crevices and scratched formed by knife.
  • Take a brush and scrub without allowing the soapy mixture to fall away.
  • The soapy mixture will look dirty brown as it had gathered the dirty with it.
Scrubbed with Brush After Resting For 2 hours
  • Let it rest for 20-30- minutes more.
  • With a scrub, scrub the board nicely. All dirt will come out in soapy mixture.
  • Wash with flowing water.
  • If the board is too dirty and looking brown rather than white then repeat the process twice. You will get a board as if brand new.
Chopping Board After Cleaning
  • Clean the other side of the board the same way.
  • Enjoy chopping on clean hygienic board. Repeat this process at least once a month.
Tips:
  • Avoid using iron scrub.
  • Longer you allow the board to soak the soapy mixture better it is. I let it stand overnight and in the morning wet it with water and then scrub.
Alternate Suggestions:
  • Liquid vanish or bleaching powder/liquid can be used instead of vanish powder.

Thursday, 17 October 2013

How to Clean Dosa Tawa (How to Clean The Iron Plate For Making Pancake)


Dosa Tawa before Cleaning Process
Dosa Tawa After Process of Cleaning

It is really irritating that when we want to make dosa, Uttapa, Chile or Pesarattu it refuses to leave the hot seat and gets stuck to it. I have had that experience whenever I have made the mistake of leaving my non-stick tawa or the tawa on which I make dosa to my maids. The problem of cleaning comes because they have to be handled with utmost care so that the surface does not get scratched. I think this problem is faced by most of us, so to unveil the mystery of bringing the dosa tawa to its old glory I am posting this article with the hope that it will be beneficial to all of those who look at the spoiled tawa with dismay.

Time for Cleaning: 15 minutes   

Material Required For Cleaning Dosa Tawa:

  • 1Piece of Onion
  • 1/2Lemon
  • 2 Teaspoon any cooking oil
  • Water
Directions For Cleaning Dosa Tawa:


Dosa Tawa With Cooked Dosa Stuck to it
Dosa Made on Sticky Tawa

  • On the Tawa put 10-15 ml. water and 5-6 drops of oil and 5-6 drops of lemon juice.
  • Heat Tawa with water and oil mixture on low flame till it boils.
  • Boil till all water evaporates. 
  • Keep heating till oil smoke starts appearing. 
  • Remove from heat and let the tawa cool.
  • Wipe away the remainder of oil mixture. Repeat the process two or three times.
  • With a clean piece of cloth wipe the tawa clean. Try masking dosa. If the cooked dosa is yet sticking then do not scratch the stuck material but repeat the above said process again till the tawa is clean of all material stuck to it.
  • Cut the onion to half and pour 1ml (8-10 drops) oil on the tawa and heat it to smoking point .
  • Cool. When the tawa is moderately hot scrub it with onion.
  • The oil will spread all over the tawa. Keep scrubbing with onion piece for 2-3 min.
  • Let the tawa cool.
  • Wash with fresh water.
  • Heat the tawa and scrub it with oil and onion piece and make dosa. 
Dosa Tawa After Process of Cleaning

  • Dosa should come clean off the tawa.
  • In case ever it gets stuck at any point do not remove it forcefully but gently remove the dosa and let the materiasl stuck to it remain as it is. Heat tawa with oil-water mixture. 
Uttapa Come Almost Clean Except At One Small Spot

  • Wipe clean with soft cloth after draining the water from tawa.
  • Scrub with oil and onion piece and make Dosa happily. It will come out clean off from hot seat making you feel winner.
Crisp Dosa After Cleaning Process

  • After making dosa let the tawa cool and come to room temperature. Wash it with fresh water and wipe it clean with soft cloth. This will make sure the thin layer of oil is maintained on the tawa.
Tips:

  • Never use harsh soap/scrub or iron spatula/scrub to clean the dosa tawa. Scratches formed will cause the dosa or chilade to get stuck to tawa.
  • Never wash hot tawa as the top layer of tawa gets spoiled.
  • Do not make roti/chapatti on dosa tawa the dry flour on the chapatti used during rolling the chapati will cause the top layer of tawa to become rough and cause dosa to get stuck to it.
  • Onions have become expensive in India so do not waste it while cutting onion for vegetable the top which normally is cut off and discarded can be used it will be easy to grab the piece from the top as it has dry leaf bunch.
  • After squeezing the juice from lemon, do not throw them. Store them in deep freeze of fridge and soak in water 5-10 min before using.
  • Always scrub the dosa tawa with onion and oil right in the starting whenever you are making dosa this will increase the life of your dosa tawa. I do it before making each dosa this makes the dosa golden brown with least oil, Dosa/chilade does not get stuck to tawa and saves my tawa also.
Alternative suggestions:

  • After cleaning the tawa if it is stubborn and yet is clinging to the dosa then instead of repeating the process again and again make omelet two three times and each time wash with hot water to let the smell of egg go away. Do not use soap or any cleaning liquid. 

Monday, 6 May 2013

How to clean Studded Jewelry


Diamond Jewelry Cleaned At Home With eating Soda-Water Mixture
Jewelry especially studded jewelry collects dust and dirt and lose their shine. The sparkle of diamond and gems is because of the refraction of light. In more simple terms when light passes through the diamond then it sparkles. If dirt collects at the inner part if the jewelry or the edges of diamond or any gem then the refraction becomes less and the sparkle reduces. The rate of jewelry collecting dirt may differ depending upon the life style of the person wearing it, but certainly cannot be avoided. Also it is very tiresome and time taking to go to jeweler to get it cleaned. Cleaning the studded jewelry at home requires little effort, saves time and money. I clean my diamond jewelry once in a month as kitchen work causes the rings to collect dirt fast what so ever precaution I may take.

Cleaning Time : 60 min.
Cleans 6-10 small jewelry items or two big jewelry items.

Materials Required For Cleaning The Diamond Or Any Other Studded Jewelry:
  • 1 Tea spoon eating Soda
  • 1 Baby Tooth Brush
  • Soft cloth
  • 1 Bowl
  • Water
Directions For Cleaning The Studded Jewelry:
  • Take 100ml. water in a bowl and add eating soda in it.
  • Put the jewelry to be cleaned in the eating soda water mixture.
jewelry with dirt on it
Jewelry in Eating Soda and Water mixture
  • Allow the eating soda to dissolve slowly and release carbon di-oxide slowly.
Bubbles of Carbon di-oxide are forming slowly and loosening up the dirt
  • The collected dirt in the crevices will swell after soaking water and the carbon di-oxide will push it out.
  • Any dirt which must been sticking to the surface will also react with water and carbon di-oxide mixture (Carbonic acid) and dissolve, thus making the surface of gem as well as metal shining. 
Jewelry after soaking for 30 minutes
Dirt from the jewelry loosening up after soaking for 30 min
  • Gold, silver platinum and white gold (Any precious metal for jewelry) are noble metals and do not get adversely effected by carbonic acid which is form instantaneously by carbon di-oxide dissolving in water and is extremely week acid.
  • Let the jewelry soak in soda water mixture for at least 30-40 minutes.
  • Most of the dirt have already fallen in the eating soda-water mixture.
  • Take a baby brush and slowly remove the loose swollen dirt from the jewelry.
  • Wash two or three times with fresh water.
  • Dry with soft cloth.
  • Sparkle will be back in your jewelry.
Jewelry Cleaned with Eating Soda-water Mixture

Tips:
  • Do not use used brush / or tooth brush meant for grownups because the bristles will be comparatively hard and may damage the jewelry.
  • Do not use ear bud as the cotton from ear bud may get stuck between gem and the metal and will spoil the look of jewelry also it will become difficult to remove the cotton fiber stuck with the jewelry.
  • Never use any blunt or sharp edge object to pry the dirt from the gem, metal or crevices of jewelry as it will cause scratches on the jewelry and spoil it.
  • In case the jewelry has not been cleaned for a long time then soak the jewelry for 60-90 minutes.
  • One tea spoon eating soda is sufficient for 4-5 rings/ ear rings / ear tops/ two studded bangles.