Showing posts with label Cleaning and Maintainance. Show all posts

Monday, 26 November 2012

Eradicating Cockroaches by Easy and Inexpensive Method

Cockroach eradicating Potion
Oh ! The creepy crawlies I detest their presence not only in my house but anywhere in my vicinity. But once they become unwelcome guest spray as much roach killer sprays, they like a bad coin keep on making their appearance with vengeance. I had very bad experience when I shifted to a a rented house unused for a year. These winged creatures were present in many size and color in hoards. I knew spraying the roach killer spray will not be effective so I made this potion and applied since then no roaches in my house.
I think so roaches are every house wife's nightmare. Well if you are unable to get rid of them and spend a fortune in pest control I suggest you try this easy, effective , inexpensive method which has no side effect and once used gets rid of roaches for almost a year.

Preparation Time: 5 min.
Effectiveness of Medicine: for 10-12 months

Ingredients Required for Making Cockroaches Medicine:
  • 100 gm. Boric Acid 
Boric acid
Boric acid
  • 100 gm Wheat flour / Refined flour
Maida (Refined flour)
  • 10 - 20 ml. Milk
  • 10 gm Sugar powder.
Directions For Making The Cockroaches Eradicating Potion:
  • In a bowl / plate take Boric acid.
  • Add wheat flour  / Maida and sugar powder to it.
Boric acid, Maida and sugar for Roaches medicine in a plate
  • Make a hole in the center of the flour mixture and add 10 ml. of milk.
Boric acid,Maida, Sugar and milk for making the Roaches eradicating potion
  •  Knead the flour, Boric acid, and sugar mixture to a very soft dough.
Testing for the softness of medicine dough
  •  Potion for getting rid of roaches is ready.
Roaches eradicating potion

Direction for using the Roaches Eradicating Potion:
  • Take a small blob (approximately 1 gm.) roaches potion and apply it on the under side of furniture.
Little blob of Roaches eradicating potion sufficient for applying at 3 spots

Roaches eradicating potion applied under the table
  •  Repeat this at a distance of 6-8 inches and allow it to dry and leave it there.
  • Apply the  potion the same way in the crevices where roaches make their home and lay eggs.
Hole between the two tiles, a breeding place for Roaches

Holes and crevices between the  wall tiles filled with Roach eradicating  potion 

Roaches eradicating potion applied on door frame
  • Apply in the cupboard it will neither leave any odor nor discolor the cloths / books / papers.
  • In kitchen under the cooking slab, and sink apply it at the distance of 6 inches.
  • Make some small balls and keep them in a paper / plate near the water drainage outlet in kitchen / bathroom when not in use, While using kitchen / bathroom water drainage remove the medicine balls in a dry place. This way they can be used fro 10-12 months.
  • Roaches will disappear for good for a year,
  • Repeat this for 2 / 3 years you will not see them again for very very long time.

Tips:
  • If you feel the beauty of your house is getting effected then apply them  under the furniture / sink / and other unobtrusive places. Roaches go where they can smell it. 
  • Make the Roach killer potion fresh.
  • If you make it in excess then store in well sealed plastic bag else it will be rendered ineffective.

Sunday, 21 October 2012

Preserving Clothes From Silver fish, Mites and Fungus by Using Neem Leaves.


A Full Grown Neem Tree
Neem Tree Branch with Leaves and Fruits

Normally silk Sari, Sari with Jari work, Woolens, chiffon and other delicate clothes  require delicate handling and protection from silver fish, mite which eats away the fiber and thus rendering the dress unusable.Fungus causes musty smell in the clothes. Naphthalene balls are most commonly used as it evaporates and the vapors do not allow the silver fish ,mite and fungus to breed. But using naphthalene has its own disadvantage as it leaves strong odor on cloths and causes discoloration of the metallic (silver and gold) work (Jari, Zardosi) of the clothes. Nature has provided us with a wonderful anti-pest and anti-fungal plant "Neem". So next time when you are keeping away all the woolens and your other delicate dresses, use Neem leaves.

Direction for protecting clothes form pests by using Neem:

  • Pluck fresh green neem leaves.

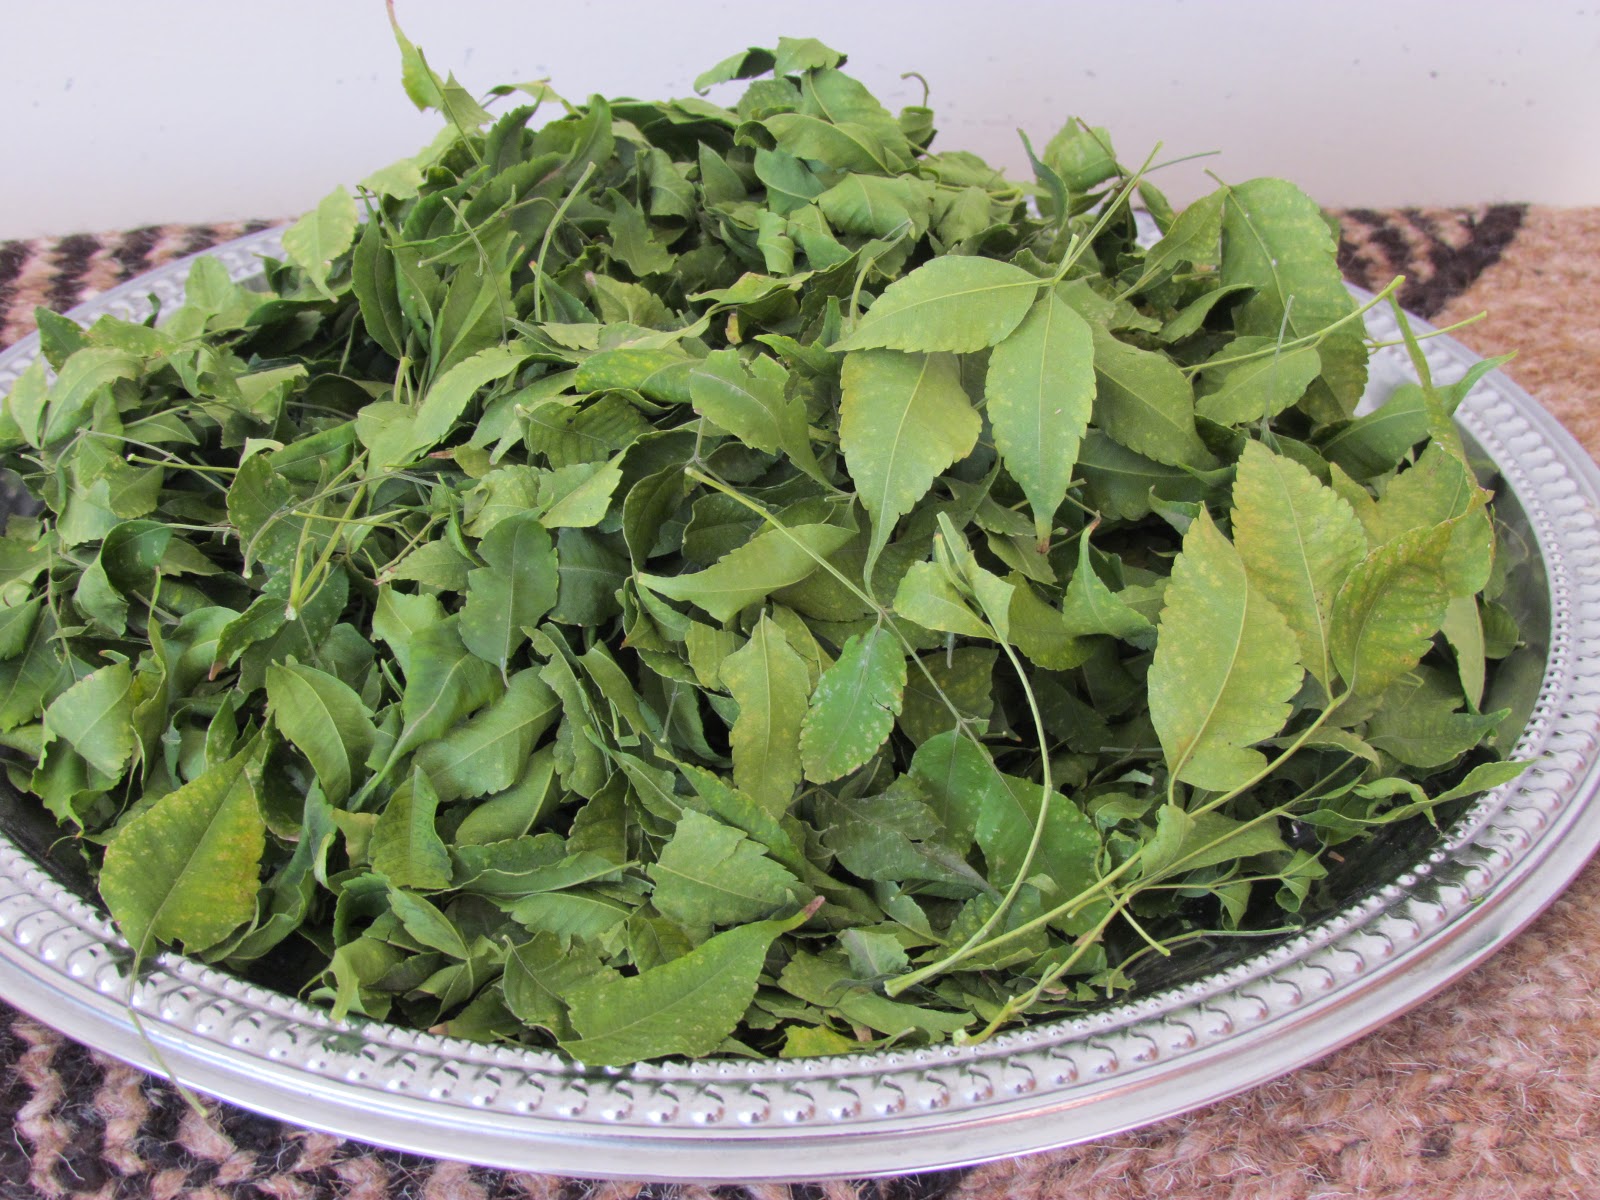
Fresh Green Neem Leaves
  • Shade dry the Neem leaves.
Neem Leaves being shade dried
Shade dried Neem Leaves
  •  Take a cloth big enough to wrap your dress.
  • Spread the cloth on a plane surface.
  • Spread handful of dry Neem leaves on it.
  • Place your dress on the leaves.
  • Spread handful of dry leaves on the dress.
  • Wrap the dress with the cloth and store.
  • Even if you do not use the dress for 2-3 years the dress will remain fresh, unaffected by silver fish or any pest, without any odor or discoloration.
  • Dry Neem leaves do not leave any color on the clothes
Tips:
  • Dry the Neem leaves in shade else the essential oil of the leaves will evaporate reducing the potency of Neem leaves.
Suggested Variations:
  • If you do not like the mess created by leaves dropping out while taking out the dress for use, make the pouches and place the pouches one at the bottom of the dress and one at the top of the dress.
http://housekeepingexpert.blogspot.com/2012/10/preserving-grains-using-neem.html
  • Pouches can be kept in the pocket of trousers and jackets,
  • Pouches can be kept in the Books and clothes Almirah, the musty smell which develops in the Almirah during rainy season will not develop and mite/silver fish will not infest the clothes and books.

Tuesday, 2 October 2012

Preserving Grains Using Neem Leaves(Indian Lilac)


Fresh Neem Leaves

Grains when kept for long time get infested with pests and thus get spoilt. To preserve them for long time instead of using the chemical preservatives available in market, it is advisable to use natural products. Neem is best naturally available pesticide, insecticide and germicide. Neem preserves the cereals and pulses (Rice ,wheat, any type of whole or broken pulses) without any side effect effect. So why use artificial preservatives for your grains when nature has provided you with natural preservative.

Material Required for Preserving  10 kg Grains:
  • 300-400 Neem Leaves
Fresh Neem Leaves
  • Thin cotton cloth (muslin cloth) 
Direction for Preserving Grains:
  • Pluck fresh green Neem leaves and shade dry them. (It will take 5-6 days to shade dry Neem leaves during winters and 2-3 days during summers)

Neem leaves being shade dried

Shade dried Neem Leaves
  • Keep approximately 100 dried leaves aside.
  • Crush rest of the leaves to coarse powder.
Shade dried and crushed Neem leaves
  • Make 5cm. x 5cm pouch of the cloth.
  • Fill the cloth with coarse powder of dried Neem leaves.
Neem leaves pouch being made
  • Stitch the open end of the pouch to seal it nicely.
  • Make 5-6 pouches for 10 kg of grain.
Dreid Neem leaves pouch for Preserving grains and clothes
  • Spread the dried Neem leaves kept aside on the bottom of the container and cover with cotton cloth or dry paper.
  • Fill 1/4 grain in the container.
  • Place two pouches at two corners of container on the grain and then fill half of the remaining grain in the container.
  • Keep the remaining two pouches at the other two corners of the container and fill rest of the grain.
  • Place the remaining two pouches on the top of the last layer of grain.
  • Close the lid of the container, the grains will remain pest free for almost a year.
Tips:
  •  Do not make the pouches synthetic cloth or plastic sheet because the essential oils of Neem which has anti pesticide effect will not be able to permeate in the grain.
  • Do not dry under the sun because it will cause most of the essential oil to evaporate and the effectiveness of Neem will decrease.                                                              
Suggested Variations:
  • Instead of making pouches shade dried leaves can be simply mixed with the grains and stored. But this causes hassle in cleaning before use.

Monday, 26 September 2011

Dry Cleaning(How to dry clean delicate clothes at home)

Cardigans Dry-Cleaned at Home
Sari and Blouse After Dry-Cleaning
While staying in cantonment area campus has its own privilege there are some short fall also. The biggest being they are far away from the city, thus it becomes painful and time consuming to go to city for every small thing. The need of dry cleaning is one amongst them. I having chemistry back ground came up with this indigenous method of dry cleaning which not only saved me time and money but also earned me appreciation and gratitude from all the ladies in the campus who learned from me. Now where ever I am I do not worry about the stain on my sari or my husband suit!
 Preparation Time: 10 minutes
Dry Cleaning Time: 30-40 minutes
Cloths Dry-cleaned: 6 (1 stole,2 Saris,2 Cardigans)

Materials Required For Dry-Cleaning:
  • Three buckets half filled with water
  •  500  ml. of petrol
  • 1 table spoon of good quality detergent
  • 2 tea cups White vinegar
Directions for Preparing the Buckets:
Uncleaned Sari with Fall and lower portion dirty
  • Keep all three buckets in line. (Referring the first bucket to as bucket no.1 , second bucket to as bucket no. 2, and third bucket as bucket no. 3)
  • Add the following to bucket no.1 and keep aside:
    • Detergent
    • 1 cup petrol ( approx. 150 ml.)
    • 1 cup vinegar
Petrol being Added to water
Vinegar being added To petrol water mixture
Detergent being Added to water with Petrol and Vinegar
  •  To bucket no.2 add the following and mix thoroughly :
    • Remaining vinegar
    • 150 ml. approx. petrol
Second Bucket is being Readied for Dry-cleaning
  • To bucket no. 3 add remaining petrol approx. 150- 200 ml. and mix thoroughly.
Petrol Being Added in Third Bucket
Step 1:
  • Take the dress/cloth which is to be dry cleaned and put it in bucket no. 1 after mixing it's content nicely.
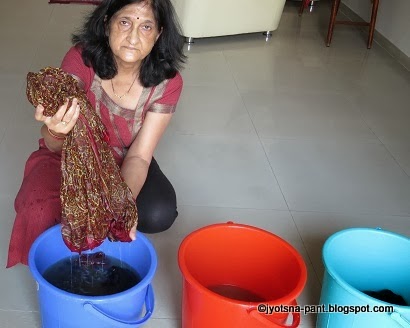
Sari being cleaned
Cardigan washing
  • If the cloth is multicolored then wash the light color side first then the dark color side.
  • Dip the cloth in the bucket and give it a gentle rub, do not scrub with brush as it may harm the delicate cloth.
  • Let it be in the bucket for 5 min. 
Step 2:
  • Take it out and squeeze it by pressing between palms, never wring the cloth.
  • All dirt and stains will be removed and the water will become very dirty after washing 5-6 medium size/2-3 large size clothes. I washed 2 cardigans, one stole and two saris before the water in the first bucket was rendered useless.
All Dirt in Water Of Bucket No. 1
  • Put it in bucket no. 2. and give the cloth nice soaking and swirling. This is to remove excess of soap and the adhering dirty water from the clothes.
After cleaning in Bucket No. 2
Dipping in Bucket No.2
  • Let it be in the bucket for 5 min. 
Step 3:
  • Take out squeeze and put in the bucket no. 3 .
  • Take the cloth out and in continuously  in the bucket and give 2-3 swirls to ensure all dirty water and detergent if any is removed. The petrol in the last bucket ensures shine and faster drying of clothes.
  • All dirt and excess detergent removed and the Sari is cleaned
  • Take out the cloth and squeeze it nicely.
Squeezing for removal of water
Dry-cleaned Cardigan being squeezed for removal of excess water
  • Semi dry the sari by holding all ends and then folding it and drying it under shade or let the excess water drip while drying, only this will take more time.
Correct way to dry Cardigans
Saris being dried
Step 4:
  • Give a mild ironing before it dries completely .
  • When dry iron it and your cloth is dry cleaned.
Cloths Dry-Cleaned at Home
Sari with Jari work and Stole After Dry-cleaning
    Tips:
  • Use good quality detergent harsh detergents are detrimental to the delicate fabric and its color. 
  • For starters,  a word of caution:  first dry clean single colored cloth. Once adept then you can try double colored and multicolored cloth.
  • If the clothes are small then 8-10 clothes can be dry cleaned in the above said material only take care that light colored are to be washed before dark, and darkest are washed the last.
  • If there are stains then gently scrub the stains when the cloth is in the first bucket.
  • Never hang woolens in a hanger or cloth line, they will loose their shape and size permanently, dry them on ground on a clean white bed sheet.
  • Once you become adept then Jari Saris, Jackets, Suit, all can be dry cleaned at home. 
  • Clothes washed by above method retain their shine and shape perfectly for a long time. 
  • To learn this, first try this on Old clothes before you dry wash new clothes. 
  • White or light colored clothes should be cleaned first followed with darker ones. Black in the last.
  • Do not let the dry-cleaned clots dry completely ironing will become comparatively difficult. The marks formed due to squeezing will require more ironing . Damp cloths get ironed fast.