Saturday 20 March 2021

संतरे के छिलकों से बनाइये खुशबूदार क्लीनिंग लीक्विड


संतरे के छिलकों से बना क्लीनिंग लीक्विड 

फलों के छिलके खास कर जिनसे सुगन्ध आती हो उन्हें फेकने के बजाय आसान तरीका अपना कर घर पर खुशबूदार लीक्विड बनाइये। यह लीक्विड पोछे के पानी में फिनाइल या लाइजोल के स्थान पर डाले और पोछा लगायें घर तो चमकेगा ही साथ साथ खुशबू से महक भी जायेगा। मैंने आम नींबू संतरे के छिलकों से बनाया। आज मैं संतरे के छिलकों से बनाने की विधि बता रही हूँ। आम /मौसमी / केले /नींबू के छिलकों से भी इसी विधि से बनाया जा सकता है।
 फल खाओ छिलके भी काम में लाओ। 
 यही तो है आम के आम गुठली के दाम 
आवश्यक सामग्री :
  • १५ - २० संतरे के छिलके
  • १०० ग्राम गुड
  • १  लीटर पानी
  • प्लास्टिक या काँच की बड़े मुंह की बोतल
 विधि :
  •  संतरे के छिलकों को ऐसे इक्ट्ठा करें कि उन्हें फफूंदी न लगने पाये। मैं एक प्लास्टिक के थैले में रख कर फ्रीजर में इकट्ठा करती हूँ आप खुले में भी इकट्ठा कर सकते हैं बस फफूंदी ना लगे इसका ध्यान रखना होगा।
संतरे के छिलके 
  • इकट्ठा किये गए छिलकों को काट लें। 
 साफ करके काटे छिलके 
  • चौड़े मुंह वाले बर्तन में १०० ग्राम गुड़ लें और २ कप पानी ड़ाल कर गुड़ का घोल बना लें। 
  • अब कटे छिलके बोतल में ड़ाल दें। 
  • अब जो बचा पानी (१ली. में से) वह भी बोतल में ड़ाल दें। 
  • एक कडछे/चम्मच से अच्छी तरह मिला लें। 
गुड और छिलके पानी में 
  • अब ठक्कन लगा कर किसी ठण्डे स्थान पर जहां धूप न लगती हो वहाँ रख दें। 
  • पहले एक महीने हर रोज एक बार बोतल खोल कर अंदर बनी गैस को निकाल दें, फिर ढक्कन लगा कर बोतल को अच्छे से  हिला के उसकी जगह पर रख दें। 
  •  एक हफ्ते के बाद आपको बोतल के अंदर सफेद फफूंदी देखेगी, चिंता ना करें, रोज एक माह तक बोतल का ढक्कन खोलें, फिर बंद करके हिला लें ताकि घोल और छिलके अच्छे से मिल जायें। 
  • एक माह के बाद ऐसा दिखेगा। 
  • दूसरे माह में बोतल को हफ्ते में एक बार खोलें, पुनः पहले के समान ढक्कन लगा कर बोतल को अच्छे से हिला लें और जगह पर रख दें। 
  •  दूसरे माह के अंत में  अगर थोड़ी फफूंदी सी दिखे तो चिंता नहीं करें। 
  • तीसरे माह में दो हफ्ते में एक बार ढक्कन खोलें और पहले के समान ढक्कन बंद करके बोतल को  अच्छे से हिलाएं और उसे उसके स्थान पर रख दें. 
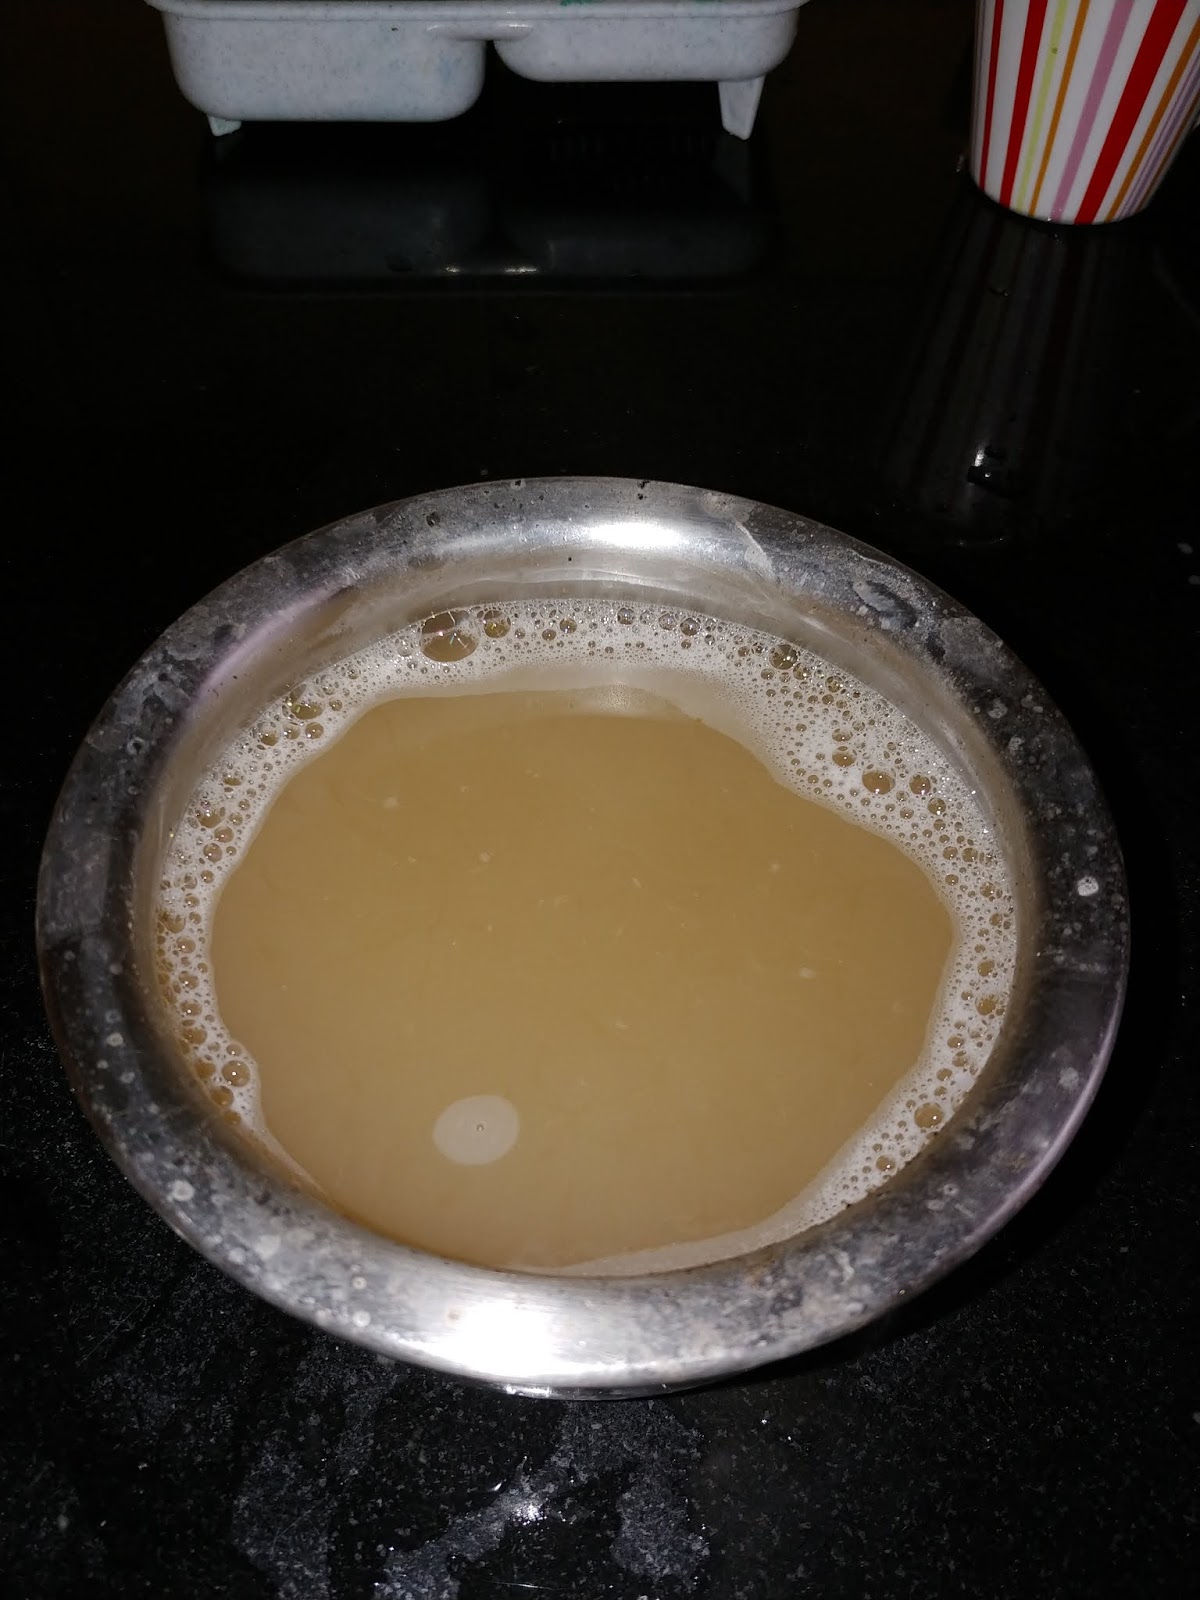
  • तीसरे माह के अंत में ऐसा दिखेगा 
तीन महीने के बाद 
तीन महीने के अंत में 
  • आपका क्लीनिंग लिक्विड तैयार है। एक छन्नी पर पतला कपड़ा बिछा कर छान लें। 
  • लीजिए खुशबूदार संतरे की खुशबू वाला लीक्विड इस्तेमाल के लिए तैयार है। 
संतरे के छिलकों से बना क्लीनिंग लीक्विड 
  • फिनाइल या बाजार के तुलना में यह केमिकल फ्री, जमीन /टाइल्स को अधिक चमकाने वाला बैक्टीरिया और अन्य कीटाणुओं को मारने में सक्षम लीक्विड है। 
कैसे इस्तेमाल करें:
  • १ली. पानी में ५० मिली. लीक्विड डालें और पौछा लगायें खुशबूदार चमकता घर बनायें। 
  • सिन्क टायलेट सीट में बिना पानी मिलाये डालें थोड़ा रगडें और पानी से साफ करें। 
जो गूदा बच गया उसे फेंकें नहीं। उसको एक डब्बे में बन्द करके फ्रिज में रख दें जब दोबारा बनायें ये लिक्विड चाहे केले /नींबू /आम /मौसमी किसी का छिलका हो ये गुदा डालने से आपका लिक्विड दो माह में बन कर तैय्यार हो जाएगा। 

Tuesday 19 January 2021

Home made Cleaning Liquid From Lemon Peels

Home made Lemony Cleaning Liquid From Lemon Peels

 It was during covid 19 lockdown I came across a news item that a lady in USA is converting her eatery's fruit peels and fruit /vegetable (raw) leftovers to cleaning liquid. I was too busy doing house hold chores and forgot about it completely till I saw an article " I got my Golden liquid". This time I could not leave it without reading complete article. It was easy way of converting fruit peels into cleaning liquid. 

I was excited to learn another way of using fruit peels apart from making organic manure from it which I do with all wet garbage of my house. 
It was season of mango so after eating mango discarding the seed I proceeded to make the cleaning liquid from mango peels. 
After three months I did get an aromatic clear liquid which not only cleaned the tiles/floor / commode but also left the house smelling heavenly. I forgot to take pictures in the hum drum of cooking, cleaning... 
In these three months I kept on collecting lemon peels in a plastic bag in freezer to avoid any fungus developing on them. I followed the same recipe as with mango peels and  finally got lemony cleaning liquid. Since then I am not discarding lemon peels(being sour they can not be used for making manure) but converting them to chemical free cleaning liquid.
Preparation Time : none 
Making time : 3 months
Ease of making : very very easy
Makes 750 ml. Cleaning liquid

Ingredients Required to make lemony cleaning Liquid:
  • Peels of 20 lemons
  • 100 gm Jaggery 
  • 1 lt. Water. 
Direction For Making Lemony cleaning liquid:
  • After squeezing juice from lemon store the peel in a bag / container in freezer. When you have almost 40 halves (after squeezing 20 lemons take out the peels from freezer and allow th to come to room temperature.
  • Crush 100 gm jaggery. Put jaggery and lemon peels in a container which has volume atleast 1.5 lt. 
  • Add 1 lt. water, mix it nicely with the help of a stick /ladle, and cover it with lid tightly. 
  • Keep it in a dark place. 
Lemon peels jaggery and water mixture 
  • After one week open the lid to release the gas formed. Cover tightly give a good shake and again keep it in dark place. 
After one week 
  • In first one month open the container every week. 
  • After one week it will start fermenting and after 15 days the pulpy part of peel starts separating, bubbles appearing on the top layer and some white fungus may appear later on. Don't worry this is normal and not harmful. 
After 15 days 
  • Next month once in two weeks. 
  • In third month open it just once. 
  • But keep on giving a gentle shake every two three days. 
  • After three months the liquid will attain light colour and peels will swell and most of them will start floating. They will become very soft and mushy. 
  • Open the container and you will be welcomed by lemony fragrance. 
After 3 months 

White fungus layer on the top of soft peels
  • At the end of three months filter the liquid with a fine sieve or muslin cloth. 
  • Clear liquid with lemon scent is the cleaning liquid we were looking for. 
  • In a separate container squeeze the remaining mushy sloid of lemon peels. 
  • Do not iscard the solid, it can be used as fermentation starter for next batch of any fruit peels. 
  • The liquid obtained by squeezing the solid will be a little murky use it to clean sink/commode. 
  • Store the clear lemony cleaning liquid in a container. 
How to use the lemony cleaning liquid:
  • Add 50 ml. Of this lemony cleaning liquid in 1lt water and mop floor with this mixture. The floor will shine and the house will be filled with amazing smell. Also it is a great disinfectant. 
Tips: 
  • Make sure the peels are stored as such that they do not develop fungus. 
  • If it is summer time and you get good sunshine in your house dry the peels and use them. 
Suggested variations :
  • Orange/mango/banana peels can be shredded and used to make cleaning liquid. 
  • The process remains the same only peels of squeezed lemon peels are replaced with shredded orange / banana /mango peels. 

Tuesday 8 December 2020

Aleo Vera Oil for Hair fall and aches


Aloe Vera Oil 

Experience with research and experimenting has taught me to be a patient and keep trying. I have Aloe Vera plant in a pot, when ever my knees, legs were painful I would cut a leaf, take the gel from it and massage my legs /knees /back with it and it gave relief from pain. I used the gel for hair fall also. 
I knew about the anti-inflammatory property of onion, carom seeds, garlic ginger etc. So I started making oil which would be helpful in pain relief as well as for falling hair and for improving the texture of hair. 
Garlic gave such strong smell to oil that I could use it hair. So I removed garlic as ingredient and used onion, aloevera and carom seeds and ginger. Finally I got an oil which has pain releaving property as well as reduces hair fall. The texture of hair also becomes very smooth after applying this oil. I have been using this oil for almost a year now. So it is well tested. 

Preparation Time : 30 minutes 
Making Time : 50 minutes
Makes 300 ml. Oil 

Ingredients Required To Make The Oil :
  • 5 Aloe Vera leaves 
Aloe Vera leaves 
  • 250 ml Coconut oil 
  • 100 ml Sesame oil 
  • 4 Teaspoons Carom seeds (Ajwain) 
  • 4 Tablespoons Onion paste 
Directions For Making Oil :
  • Cut Aloe Vera leaves from sides. Carefully remove the upper green cover and scoop all gel from the leaves. 
Different Stages of extracting gel 
  • Peel onion and cut to pieces. Pulse it in grinder /mixer to give fine paste. Do not add water. 
  • In a big thick bottom container take 

 Oil, Onion paste, Aloe Vera gel, Carom seeds 
  1. 250 ml coconut oil 
  2. 100 ml Sesame seed oil 
  3. Onion paste 
  4. Carrom seeds 
  • Keep the container with oil and herbs on medium heat and let the oil mixture start to bubble. 
Oil and herbs bubbling on low heat 

Mixture cooking on low heat 
  • Once it starts bubbling bring the heat to low and cook with regular stirring. 
  •  The mixture will start foaming. Switch off the heat and let it cool a bit for foam to settle down. Then again bring the heat to low and cook with stirring. 
Stage when heat to be switched off 
  • Repeat this process of switching off and switching on while cooking till foam appears. Do not stir vigorously. Be gentle while stirring else foam will come out of container spilling the oil. 
  • After almost 40 minutes it will be observed that the Aloe Vera gel has shrink to strips and onion paste turned light pinkish brown. 
  • Switch off the heat and allow it to cool. 
Oil ready with residue turning brown 
Residue to be discarded 

  • The oil density and color will change and residue will have turned brownish. 
  • Sieve the oil, squeeze  oil from residue as much as possible. 
  • Store this oil in any type of container you wish to. 
  • Apply this oil luke warm on scalp and hair strands. Keep for minimum 2 to 3 hrs. (I prefer 5 to 6 hrs.). 
  • Wash hair as usual. 
  • Repeat this once a week. After some time you will notice reduction in hair fall and hair texture changing to smooth silky texture. 
  • Legs, back, joints pain is relieved by massaging by this oil. 

Tips:
  • For 350 ml oil I took 2lt container to make sure foam does not spill. Take bigger container till a certain degree of expertise is obtained in handling hot oil foam. 
  • Container should be thick bottom. 
  • Cook only on low heat with constant stirring. 
  • Switch off heat when residue starts turning brown, the residual heat will keep on removing the remainder moisture from gel and onion paste. 
Suggested variations :
  • 100 ml. Sesame seed oil can be replaced by 50 ml each of sesame and mustard oil. 


Saturday 18 July 2020

चाय की छन्नियों को साफ करने का आसान तरीका


चमकती हुई साफ़ छन्नियां 
अक्सर चाय की छन्नियां कुछ दिन इस्तेमाल करने के बाद बदरंग होने लगती हैं और उनकी जाली में चाय के बारीक कण फंस जाते हैं और जाली गंदी हो जाती है।
चाय की छन्नी को साफ करने के लिए उसे या तो रगडना पड़ता है। कितना भी रगड़ो सभी बारीक कण और स्टील के फ्रेम और जाली में चिपकी सभी गन्दगी नहीं निकलती।
कुछ लोग छन्नी को धीमी आंच पर जलाते हैं।
जब छन्नी जलाई जाती है तब धुआँ और गन्ध आती है। छन्नी काफी हद तक साफ तो हो जाती है परन्तु उसका रंग जलने के कारण काला हो जाता है।
छन्नी साफ करने का नया और सबसे आसान तरीका जिससे छन्नी काली नहीं बल्कि बिल्कुल नयी जैसी हो जायेगी।
सामग्री ;
  •  १ चम्मच सर्फ या अन्य कोई कपड़े धोने का पाउडर
  •  १ दांत साफ करने का पुराना या नया ब्रश
  •  १ डोंगा जिसमें छन्नी रक्खी जा सके
  •   पानी
साफ करने की विधि ;
  • डोंगे में इतना पानी लें कि छन्नी का जाली वाला भाग उसमें डूब जाये।
  • डोंगे के पानी में एक चम्मच सर्फ डाल दें।
  • गन्दी छन्नियां डोंगे में डाल कर डोंगे को गैस पर कम आंच पर रख कर गरम करें।
मैली छन्नियां 
मैली छन्नी 
साबुन के पानी में छन्नियां 
  • पानी उबालने लगेगा और छन्नियों की गन्दगी धीरे धीरे पानी में आने लगेगी।
  • पांच मिनट तक कम आंच पर उबालने दें।
  • गैस बन्द कर दें और छन्नियों को पानी में ही ठण्डा होने दें।
  • आप देखेंगे कि पानी कचैला और गन्दा हो गया है।
५मिनट उबालने के बाद 
छन्नियां उबालने के बाद बचा पानी 
  • एक एक करके छन्नी निकाल कर ब्रश से साफ करके धो लैं। रगड़ने की आवश्यकता नहीं पड़ती।
  • आपकी छन्नियां साफ सुथरी चमचमाती नयी जैसी हो जायेंगी।
चमचमाती साफ छन्नियां 
टप्स:
अगर आपकी छन्नियां प्लास्टिक की हैं तो बड़ बबर्तन लें। 
साबुन पाउडर और पानी डाल कर उबाल लें। 
गैस बन्द करके पानी ठण्डा होने तक छन्नियां उसी में रहने दें। 
ठण्डा होने पर ब्रश से साफ करके अच्छे से धो लें। 
छन्नियों के साथ ना उबालें। 

Thursday 16 July 2020

How To Clean Tea Strainers


Clean Strainers
It is seen that tea strainers whether they are metallic or of synthetic material, after few weeks of use they start getting stained and the seive starts getting clogged by very fine particles. I make ghee at home so I use the strainer for straining ghee (Clarified butter) also.
Scrubbing the stariner for cleaning is not a great option as the edges between sieve and the meatl strip retains the dirt, also it is too cumbersome with not so staisfactory results. After some time the strainer looses its shine and we normally discard it and get a new one.
Some people keep the stariner on low flame till all particles in the siave, all dirt in the edges gets burnt, then scrub it hard to clean it. This though cleans to quite an extent but the stariner becomes black due to getting burnt. Also burning leaves the kitchen with disagreable smell and lots of smoke.
Today I am telling the best, easiest way of cleaning the strainers.

Material required:
  • 1 Teaspoon: Cleaning Powder or Cleaning Liquid (I used Surf)
  • 1 Old / New Tooth brush
  • A pan big enough to hold your strainers
  • Water
Direction For Cleaning Tea Strainers:
Dirty Strainer
Dirty strainer
Dirty Strainers
  • Take a pan big enough to put your stariners in it.
  • Fill the pan with water and add one teaspoon of cleaning powder / Liquid.
  • Put the stariners in the water and cleaning powder mixture in the pan with the sieve side in water.
Dirty Strainers Kept For Boiling In Water Soap Mixture
  • Keep the pan with stariners, water and cleaning powder mixture on medium heat and allow it to boil.
  • Once the water starts boiling lower the heat and let it boil for 5 minutes.
  • Water will become murky due to dirt of stariners coming in it.
Dirty Strainers in boiling water and soap
  • Let the water cool.
  • With the help of tooth brush remove all particles and stains by slowly scrubbing it. It will be very easy and effortless. It will take just a minute or so. 
  • Wash under flowing water. 
  • Lo and behold you have your strainers looking new ans shiny again.
Cleaned  Strainers
Tips:
  • Incase of synthetic stariners water and cleaning powder / liquid mixture will have to be boiloed first, then afetr switching off the heat the dirty strainers will have to be put in it. Let the strainers be in the hot water cleaning powder mixture till it cools off then scrub them off clean. 


Sunday 2 March 2014

Make Manure At Home

One of the many potted plant in soil with home made manure
When I moved to city apartment from government bungalow with open space around it I was appalled by the sight of flowers used during prayers by city dwellers strewn all over road side telling the tale of apathy towards the  sacredness of those flowers as well as toward the cleanliness of the surroundings. During rainy season these flowers would rot and leave a decaying stench all around. It made me think how will I dispose of the flowers I use for worshipping the deities.  I did not want these sacred flowers to become nuisance for others nor did I want them to be trampled by passerby’s feet.  Thus I got this Idea of making good use of these flowers without causing any trouble to anybody. Just imagine how would you feel if you see the bouquet so fondly presented to friends lying by the roadside after a day or two. Want to save your friend and family of the same trouble? This easy method can be used in small flats also. No stench, No hassle all flowers and leafs used to make manure for the potted plants.

Ingredients for Manure:
  • All flowers and leafs used at Home
Directions For Making Manure from the Flowers and Leafs:
  • Instead of throwing the flowers and leafs in dustbin/roadside to decay and cause stench or trampled upon, Allow them to dry in the Sun/Shade whatever is possible in your apartment.
Flowers and Leafs drying
  • Separate the petals to break the flowers to small parts and it easy to dry.
Flower Petals Separated during Drying
  • It is better if the flowers and leafs are kept for drying in the wooden basket as it allows aeration.
  • When the flowers/leafs are dry grind them in domestic mixer/grinder to make coarse powder.
Powdered Dry Flower and Leafs added to Soil
  • Mix the soil of pots with this dry coarse powder of the dry flowers/leafs and mix nicely.
Mixing Powdered Flowers and Leafs with Soil
  • Sprinkle little water daily in the morning for three four days and allow the mixture to dry in open. After three four days the soil with home made manure is ready for pots and potted plants.
Soil with Home Made Manure Ready for pots and Potted Plants
  • Fill this soil and dry flower/leaf mixture in the pots and water the soil in the pot to make it wet. Do not water so much that water starts draining from the pot.
  • Let the flower/leaf powder and the soil mix and this will make excellent compost from the flowers which you use to decorate the house/pray.
  • When the soil with manure dries in a week or so plant the plant of your choice and water according to need of the plant.
  • You have just saved your city from some extra garbage, yourself expenditure of purchasing manure and citizens from the ugly sight of strewn, decaying flowers and bouquets.
  • Make use of the home generated wet garbage and save your city.
Tips:
  • Holes can be made to big/small cartons and can be used to dry the flowers/leafs.
  • Flowers can be split to smaller pieces and leafs removed from their stalks. This enhances the rate of drying.
Alternate Suggestion(s):
  • The flowers and leafs can be ground to paste and mixed with little amount of soil and filled in the big pot. Repeat it till the pot is full. Cover it with dry soil and allow to rest for 10-15 days. The wet material will change to fantastic compost.
  • The pot with soil and compost is ready for plant to be potted.
  • Those who have open area around house can always dig a 2ft x 2ft hole and put the flowers and leafs for decaying so that it can automatically gets mixed with soil and manure is formed in 10-5 days.